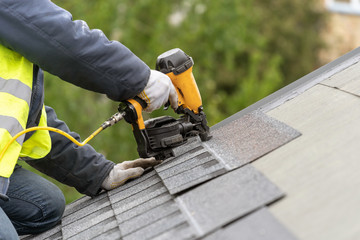
To get the most out of your roof installation project, you must ensure that all shingles are in the same position. To achieve this, you need to start by lining up the edges and overlapping the edges of the roofing shingles. Once Roofing Company Wisconsin has a squared-off edge, they can begin to install the next row. It is recommended to overlap each row about six inches.
Next, you need to mark where you will place screws. Generally, this is done by drawing a line six inches from the top of the panel. You can also use chalk lines to mark the screw points every two feet. After this, measure the distance between each screw point. Once you have established where you’ll place each screw, you can cut the panels to fit. Use self-tapping screws or #12 metal-to-wood screws to fasten the panels together.
Once you’ve finished cutting panels, you can start the roof installation. Make sure to purchase ten to fifteen percent more than you need. Remember to measure accurately to avoid errors. For a more professional appearance, you can paint the roof projections. To ensure proper ventilation, use an attic ventilation calculator. You’ll need to know the height of your attic to use this tool. You’ll also need to purchase eave trim if the attic doesn’t have gutters. This trim is placed above the roof line, which functions similarly to gutter flashing.
When using starter shingles, you don’t need to overlap your shingles. Instead, you can use them two to three inches above the drip edge. You can then fasten the starter shingles with five nails. You can also place the nails at a distance of two to three inches from the bottom eave. Starter shingles should have their adhesive strip facing upward, so that it bonds with the shingles above it. This will ensure a tight seal, which decreases the risk of wind damage and water infiltration.
After your roof installation has been completed, you should check with your roofing company to ensure that it has followed all safety regulations and adheres to building codes. You should also make sure that the contractor has insurance. This will ensure that all employees are safe and well-protected during the installation process. The roofing company should also clean up all debris that was left on the roof. Finally, you should sign off on the final inspection.
During the roofing process, it is important to apply an ice and water barrier around the entire roof, especially at the bottom edge. This ice and water barrier will prevent water from leaking under the lower rows of shingles. You should also install an ice protection underlayment in the roof to prevent water from getting under the lower rows of shingles. If you choose to use ice protection underlayment, make sure to remove the adhesive backing on it before applying it to your roof.
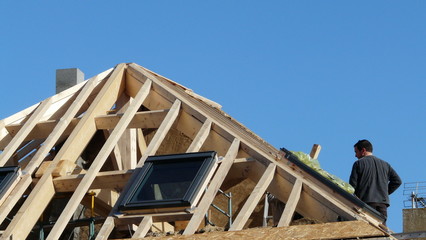
During the roofing process, your roofer will perform a thorough inspection to check the condition of your home. They will check your roof’s overall condition, shape, and age, as well as if the current materials are still in good condition. If your current roof is in bad shape, the contractor may need to replace the sheathing first. In this case, it is best to hire a professional roofing company that will do the job with the utmost care.
The installation process can last from a few days to a week. After getting the required permits, your contractor will begin work on the roof. After that, they will finalize the plan and order the materials needed. This process can take up to a week if the project is large. Once the process is completed, your roof will be in good condition.
Before your roof installation, make sure that you have informed your neighbors and family about the project. A new roof installation project can be quite noisy. Hammering and removing old shingles will make the process noisy. Therefore, if you have children or sensitive members in your family, you may want to relocate them elsewhere. Also, you will need to contact your local government offices in advance to obtain a permit.
When measuring for a new roof, you should take the time to determine the slope of your roof. The slope is measured as the ratio of rise over run. To calculate this, you can measure the slope of your roof using a long level. Using the same method, you can measure the roof area of a house with dormers. Depending on the material you choose, you should buy about 10% to 15% more material than you think you need. This way, you can account for any unforeseen cuts or mistakes.